

About a year ago, we bought and started renovating a new house. Since renovations were pretty major, including a pretty thorough overhaul of the two-wire electrical, I wanted to integrate modern “smart home” integration.
There are several automation routes out there. The consumer leaders are Amazon, Google, and Apple, with Alexa, Google Assistant, and Siri/HomeKit for voice interface, respectively. There are dozens of different protocols, methods, apps, proprietary protocols, and services that all may or may not play together. If you play across the different ponds, there is an array of bridges or gateways to make one service work with another. It’s a mess, and the market is changing quickly.
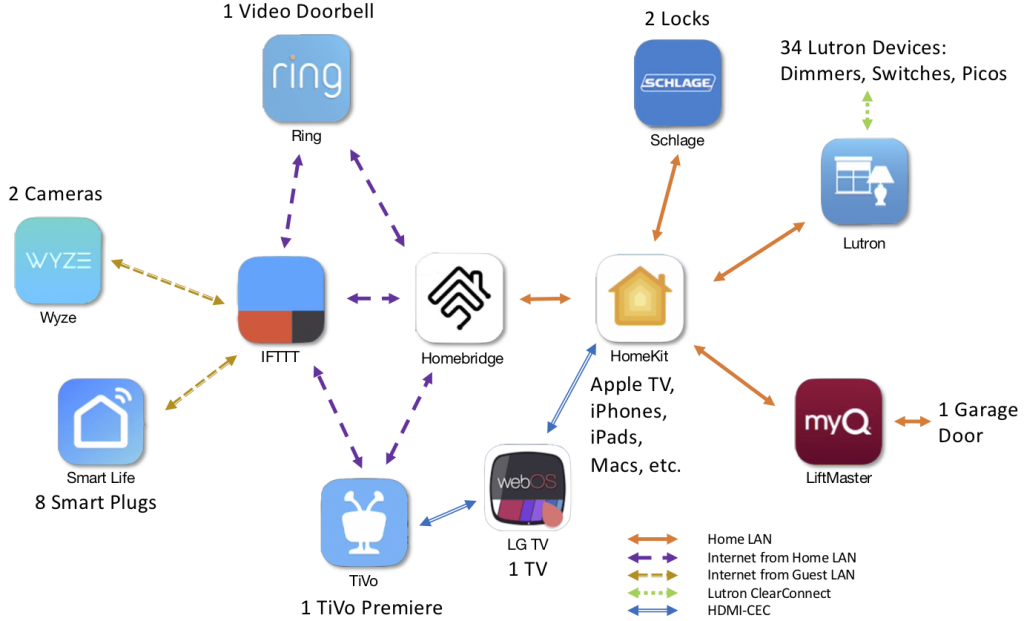
My wife and I are heavily invested in the Apple ecosystem, with iMacs, iPhones, iPads, an Apple TV, and an Apple Watch for me. Apple’s HomeKit lags Amazon and Google in the number of devices and services that are compatible out of the box, but that’s largely because of Apple’s focus on security. I really don’t want to invite either Alexa or Google Assistant to be listening in my house all the time; I trust that Apples interests align with mine on security much more so that Amazon or Google. So, I chose to go with HomeKit. Here are the heuristics I went with on our architecture:
- Everything should be HomeKit compatible to the extent that all basic function should show up in the Apple Home application
- Everything should be controllable without the need for an app. That is, all lights should have a light switch, powered outlets should have a switch, locks should have a key, the garage door should have a remote.
- Be mindful of security. If someone in China can turn the porch light on or off, that’s not a big deal. But if someone local could unlock the front door or open the garage door, or someone in Russia can watch a camera in the house, that is a big deal.
- Value-minded, with the realization that often the cheapest options my be selling you to someone else.
Here’s where I ended up.
Internet Connectivity
We put a wiring closet in the center of the house. Our current provider is AT&T, with gigabit fiber coming into the closet, using their WiFi hub. So far, that’s worked fine to reach all devices that need WiFi all over, and even just outside, the house.
The router has four wired Ethernet connections. I put an 8-port Ethernet switch in the closet, with Cat 6 going to Diane’s office (2 wires), my office (2 wires, plus another 8-port switch), the TV in the “window room,” our primary living area (3 wires, plus an 8-port switch), and one back to our bedroom.
The idea is that any required “smart home” hubs should go in the wiring closet. In practice, they are a bit more distributed. The Apple TV, the primary HomeKit hub, is attached to the TV, in the main living space, a Raspberry Pi that I use for homebridge, is in my office, the myQ Home Bridge is in the garage, while the Lutron Caséta hub is in the wiring closet. The Pi may eventually move to the closet.
Our network is divided into a home LAN for trusted devices, and a Guest SmartThings WiFi, where I”m putting devices I don’t trust to directly access the crown jewels. More on that later.
Lighting
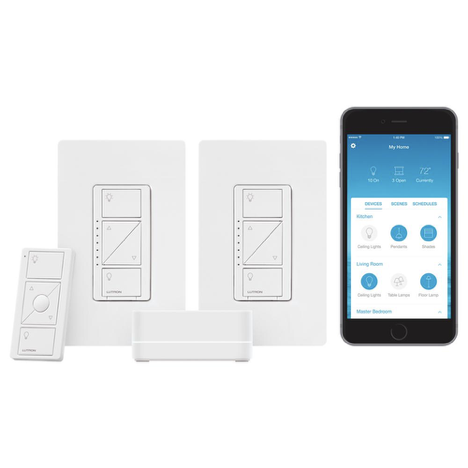
For overhead lighting, I went with the Lutron Caséta (https://www.casetawireless.com/) line of in-wall switches and dimmers, with LED lighting. For the primary living area, we used inexpensive LED can lights grouped together in reasonably-sized zones. These switches use their own, proprietary wireless communications to a central hub. The dimmers work with the original 2-wire electrical wiring, while the Caséta on/off switches require a dedicated neutral wire. Most everything is dimmable.
Going with smart switches, rather than smart bulbs, was a major architecture decision. The smart bulbs give more choice for things like color, and the ability to move a particular light from one group to another if it makes more sense. But, at this point, smart bulbs are a lot more expensive than dumb ones, and with smart bulbs, your wall switches (if any) are network devices that communicate to the central hub. I’m happy with having lights that work just fine, even if our in-house network is completely shut down.
With the Lutron switches, every installed light is controlled by a physical wall switch. Additional switches (e.g. 3-way switches) are using the Lutron wireless protocols to control those physical switches. They have ~10-year batteries in them, so that will eventually be an issue. Especially if Lutron were to go belly up, or abandon the technology.
The Caséta switches are much more expensive than dumb switches, and on the high end for smart switches. HomeKit compatibility does come with something of a premium. Pluses are: an established brand, a US company, device traffic isn’t on WiFi, and traffic is limited to the property, other than what goes through the gateway.
I ended up with about a dozen dimmer switches, about half that many on/off, and still have about 9 dumb on/off switches for areas that aren’t yet automated, such as my office, the laundry room, and the bathrooms.
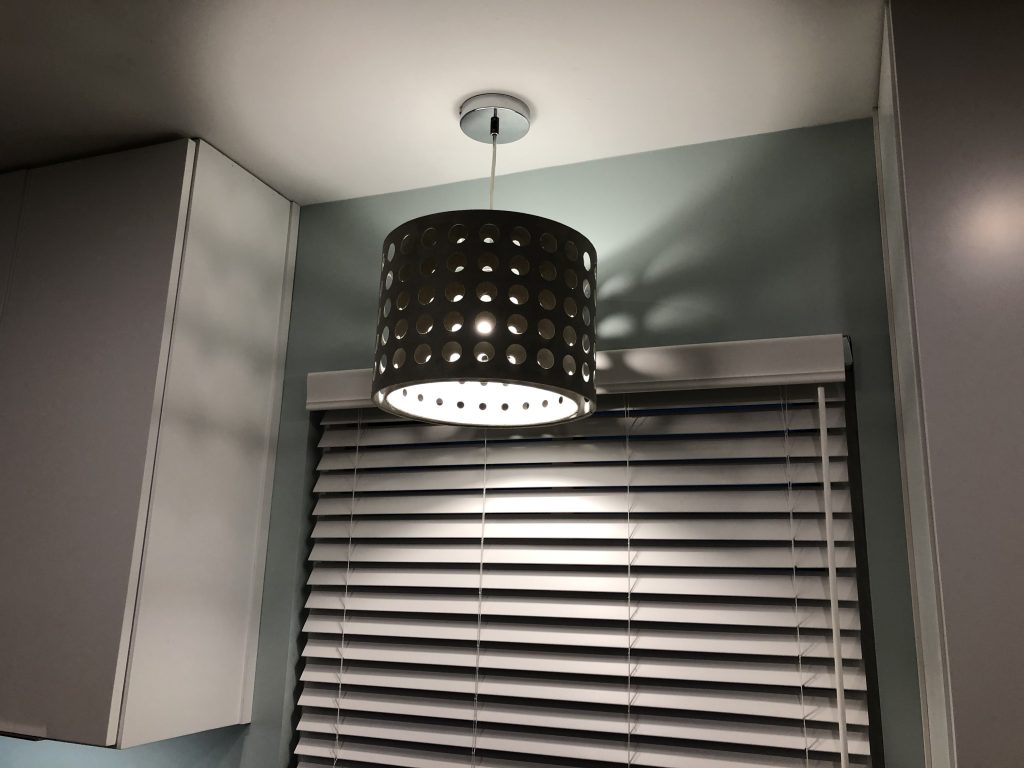
I like the lighting setup pretty well. I wish the dimmable cam lights we chose went dimmer; at their dimmest they are still fairly bright. Our foyer and undercounted lights don’t go completely dark, even when off, due to current leakage from the switches. That’s really okay on the undercounter, but annoying on the foyer. On the list of things to eventually fix.
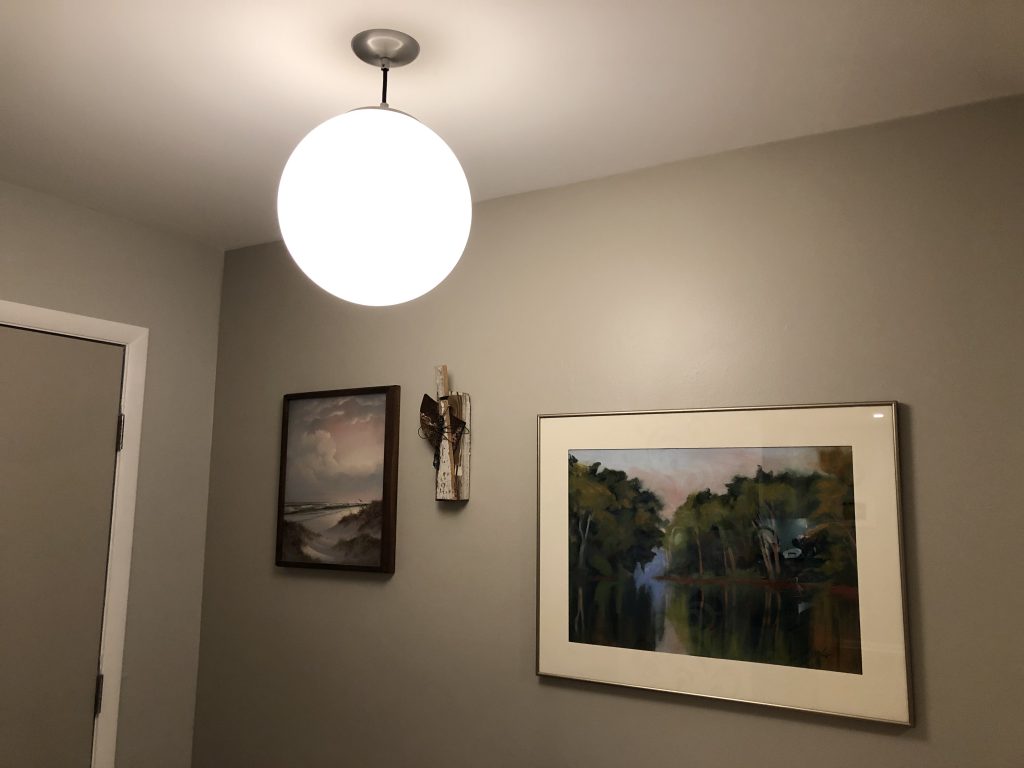
Lights:
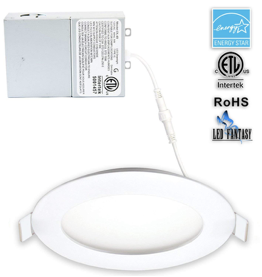
- LED Fantasy 4-inch 9w 120 V Recessed Ultra Thin Ceiling LED Panel Daylight/Dimmable throughout kitchen, window room, and Diane’s office
- Soules LED Pendant (with the dimming issue) in foyer
- Brushed Nickel White Long Cone Pendant (3) over bar
- American Lighting LED Rope/Tape Hybrid Lights under counters in kitchen
- Graytr Pendant Lamp over kitchen sink
Doors
The house has three exterior doors, plus a garage door. That’s a lot easier to deal with than the seven exterior and garage door (plus two more on the back studio, and three sheds…) at our former home!
Exterior Doors

For the front door, and the door between our kitchen and garage, we went with the Schlage Sense door set. It provides a keypad and deadbolt keyhole on the front, as well as access through the Schlage and Home apps. You can set and enable access codes, and have different codes for different people. This was especially handy in that we could set up a “worker code” for contractors during renovation, and have the code active only during normal working hours. You can go back to see who coded in, and when. The Schlage app is required for setting and managing codes; HomeKit lets you open and close the lock, including as part of a scene or automation. A weakness is that you can’t tell from the lock whether or not the door is closed, though if the lock can’t successfully extend you will get an alarm. Home Depot occasionally has a pretty good deal on the set.
The back door is an Andersen patio door, keyed the same as the other doors. I haven’t seen any smart locks compatible with the Andersen door system yet.
Garage Door
We bought a LiftMaster “smart” garage door opener through the installer, with the requirement that it be HomeKit compatible. Annoyingly, the LiftMaster 8355W did have the Chamberlain/LiftMaster myQ smart functionality, built in, with WiFi connectivity and an iPhone app, but we had to buy another device, myQ Home Bridge for another $70 to get HomeKit compatibility. We would have been better off with a dumber opener plus the Home Bridge for less confusing setup.
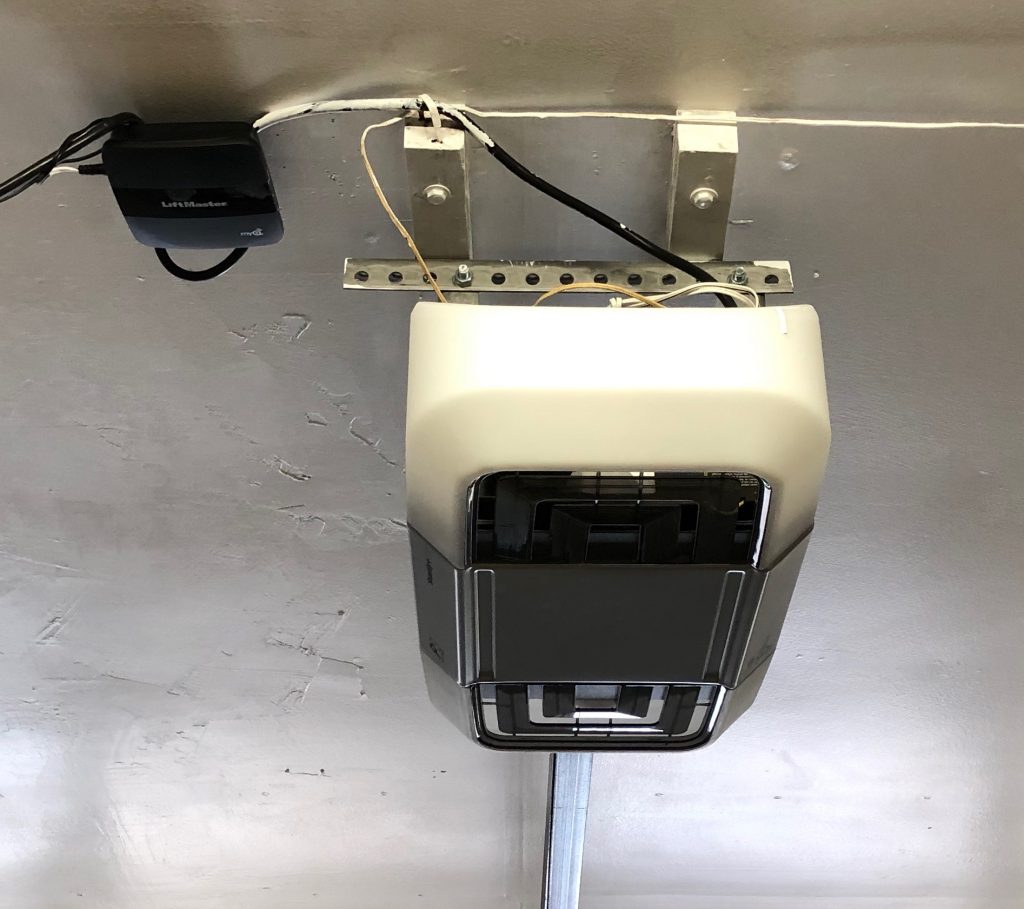
Chamberlain and LiftMaster are both part of the Chamberlain Group, a US company. Their garage door openers are essentially interchangeable, as are the Craftsmen openers the sell (sold?) through Sears. Chamberlain is their DIY product, while LiftMaster is sold through contractors. The software is identical and interchangeable.
Set up was confusing, and getting it all going again after a change in WiFi password was a bit of a nightmare. However, everything seems to work fine once set up.
One other annoyance is that the opener has a light in it that comes on for a while when you open or close the door. You can turn on the light from the installed switch, too. But there is no way to control the light from the myQ or Home app. How hard would that have been?
Overall, not thrilled with that piece of things, but fairly confident they at least have incentive to keep their connectivity secure. And there is no other choice with HomeKit integration, at least per what is listed in Apple’s canonical list.
Doorbell
I bought the Ring Video Doorbell Pro, based on their June 2016 announcement of compatibility. Now it’s 2019, and still no compatibility. Over a year later for me, over 2.5 years since the announcement, and they still say they are testing for release Real Soon Now. One suspects the acquisition of Ring by Amazon may have had a negative schedule impact.
Frustrating, but the Ring app isn’t bad. We purchased the doorbell through Costco, who provided the first year of the Ring account in the list price. I just renewed for another year for $30. Without the account, you can’t review any of your video.
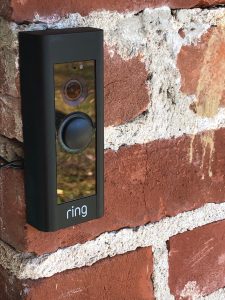
The Ring Video Doorbell Pro is designed to replace an existing doorbell. I had to actually replace my transformer, but not the wiring or bell, on my existing doorbell. The doorbell detects motion, and will a minute’s worth of video (with audio) at each detection. You can set the sensitivity of detection, and map what areas of the field of view of the camera you want it to pay attention to. You can also schedule the motion alerts, to avoid lot’s of notices when the year is being mowed, for instance. You can also sleep your notices for up to a couple of hours.
When someone hits the button, the doorbell in the house rings, just as you would expect. A notice also shows up on devices with the Ring app. In the app, you can view the video live, and even hit the button for a two-way audio chat (they can’t see you!) with the person at the door. The video is recorded, as well.
You can also use the app to look at live video any time you like.
The services are convenient. I don’t consider the video outside my house to be highly sensitive, although the audio at my door could be picking up speech inside as well as out. Recent reports show that Ring hasn’t been particularly careful to protect what they capture and store, which is troubling. So I don’t strongly recommend Ring for a doorbell to work with HomeKit, but don’t have any good alternatives. August officially backed out of previously promised support. Robin, a company from the Netherlands, has announced a $600+ HomeKit doorbell that’s now on Apple’s official list, as Ring used to be. Netatmo, a French company, announced the Netatmo Smart Video Doorbell at CES for delivery in the second half of 2019, in the $250-$300 range, with access to your own video to your own storage without a monthly fee, though they don’t appear on Apple’s list. That’s promising, but for now there is a real gap in the doorbell and video camera area with HomeKit.
Besides waiting on Ring to get HomeKit integration, there is the possibility of using IFTTT to detect motion or a ring. More on hacks later.
Outlets
There are numerous smart plugs available with HomeKit compatibility. They tend to be pretty expensive. The cheapest are about $20 in bulk, and can easily run up to $75 each. So I went a very different way that, at least at first blush, seems to violate my guidelines. But I got close enough for my comfort zone.
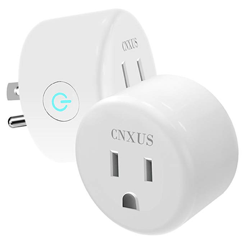
I picked up several small round smart plugs from the Smart Life ecosystem on Amazon. The price runs about $10/each (I see a 2-pack for $18.99, a 4-pack for $33.99 right now). These are produced under license to Tuya, a Chinese company. Hardware is produced by dozens of Chinese companies, with very similar design. The Smart Life app is available for free on iOS.
I bought two branded CNXUS to test out, and ended up getting four EFUN and two TanTan plugs as Christmas lights started going up.
Setting them up requires providing your WiFi SSID and password through the app, to allow them to connect. I have to assume that means that someone in China has the information, and can quite possibly see all the traffic on that network segment. Not great. To combat the security threat, I created a separate Guest network on my router, where the untrusted devices go. There, they can spy on themselves, and report when my Christmas lights go on or off.
Smart Things also work with IFTTT (If This Then That), and US online service that connects different Internet of Things service together. To bring in HomeKit, I’m using an open source program, homebridge, IFTTT, and Smart Link, to make the switches show up in the Home app. More on that later.
Other Items
That’s essentially all I have in my HomeKit ecosystem so far. I did buy a couple of Wyze camera, inexpensive ($20-$25) HD camera that work a lot like the camera on the Ring. Working with IFTTT, I can turn them on or off – but don’t know how to be sure they aren’t actually recording when they say they aren’t. I have one in the Garage, to be able to remotely verify that the garage door is closed when it’s supposed to be. The other I’ve tried for various things. This is another piece of very untrusted hardware that goes on the SmartThings SSID. Neither the Ring nor the Wizen cameras currently show video in the Home app, but can be used to detect motion.

I considered smart smoke/CO detectors, but couldn’t convince myself of the value. In theory, the Wyze camera will tell me if it hears the alarm go off.
I also haven’t gone for any of the smart thermostats. It’s high on the list for further investigation.
We kept a couple of regular old ceiling fans with pull strings for fan and light operation. We added a couple more, with remote control operation. The only HomeKit options were ridiculously expensive. I hope someone will produce a reasonably-priced retrofit kit, or a compatible control replacement.
Hacking
One of the benefits of Apple is the “it just works” mind set. As long as you stay in the center of the road, buy fully supported gear, and operate as intended, everything should work seamlessly together, as designed. And, it’s typically designed well for usability. I appreciate using something that is designed well, as does my wife, Diane.
On the other hand, I do have the tinkerer gene, as well. I can use something that’s pretty marginal, if it saves money, or time, or is just interesting. And if I can make it play like a good citizen, then I can share it with Diane…
There is a piece of free, open source software, called homebridge, that acts as a bridge for various connected devices. It opens a whole world of hacking opportunities, with plugins for various different smart home systems and components. Some work great, some are half-baked, some not even in the oven. It definitely lives in the linux/maker world view.
It will run on linux, or on a Mac. I bought a Raspberry Pi (a super-cheap, ARM-based linux computer for hobbyists) to build and run homebridge on, using the instructions on GitHub.
Homebridge is essentially a hub to other devices and services. You have to add your server as a device in the Home app, and agree to run it despite it not being a trusted device. By loading different modules, you can bridge in different device and service systems, such as Nest, LIFX, WeMo, Logitech Harmony, z-wave, and more.

Besides going directly to another service, homebridge will also work with a service that works with other services. If This Then That (IFTTT) is a web service that brokers interaction between your connected devices. In general, you give IFTTT permission to talk to your accounts in two or more different services, and it gives you the ability to share triggers and actions between the serves.
I set up homebridge with IFTTT to let HomeKit tell IFTTT when my Smart-Life-compatible smart switches should turn on or off. Then I configured IFTTT to talk to my Smart Life account, to forward the messages. It actually works quite well.
I can do similar things with my Ring doorbell, the Wyze cameras, and even my Tivo.
It does mean trusting yet another service. At least IFTTT doesn’t typically need your actual service credentials, just permission to access the services, so if they are compromised the bad guy can’t get access without actually controlling IFTTT resources.
I may eventually move more of the devices from IFTTT to direct connections, where that makes sense. For now, the quality of the various home bridge plugins, and what they can do compared to IFTTT, varies wildly.
It’s been fun messing around with the uber-nerdy, do-it-yourself side of things. It’s a bit like playing a computer game. It’s very definitely not for everyone.
Wrap Up
HomeKit is a very reasonable choice for home automation for a family who all have iPhones, and don’t intend to change. It’s probably the most secure on the market, and provides all the basic gadgets you need to automate your home. But it’s going to cost more than Alexa, and there are less options in what you can buy. It’s probably worth it, if security is high on your list of considerations. What it does, it does well, reliably, and securely.
Homebridge can moderate both the positives and the negatives of the HomeKit environment, if you want to wade in. It opens many more options for things you can control, but opens your network to more risk, as well.
I’ve had fun, and so far am enjoying the automation more than being annoyed by it. That’s pretty good, I think.